
This design tip offers several ways to make your next multipart design less like a root canal and more like a day on the beach. Many of these tips are geared around injection-moulded parts, but some apply to machined and 3D-printed parts as well. These include:
- Symmetrical parts
- Self-mating parts
- Family moulds
- Hardware components
- Monoform parts
- Assembly considerations
- Overmoulding and insert moulding
- Liquid silicone rubber parts
- Alternative processes
Searching for Symmetry
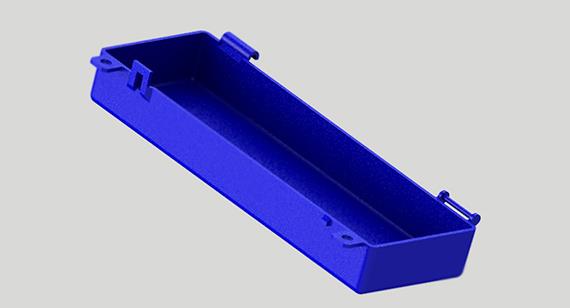
It might be hard to wrap your mind around at first, but many assemblies traditionally constructed of two unique components can often be made from a pair of identical parts. Consider the two halves of a housing for a prototype gear housing assembly. Conventional wisdom might say to put bolt holes in one half, threaded bosses in the other, then use half a dozen or so fasteners and washers to bolt it all together. But this requires machining two separate injection moulds (or machining two unique parts, if a metal prototype is needed). By making the two halves symmetrical, distributing the holes and threads in each part equally and opposite one another, a single mould can be used, cutting tooling costs in half.
Self-Mating Parts
But why not get rid of the screws altogether? Our gear housing example is now symmetrical, but it still requires manual installation of threaded inserts, never mind keeping track of all those pesky screws and washers. A simple system of mating clips and hooks allows the two halves to clip together, not only eliminating the need for additional hardware but making the assembly process a snap. Take this one logical step further and replace the clip mechanisms with a living hinge along one edge of the power drill housing and you now have a single-piece design. The bill of materials (BOM) has been reduced, assembly time has been cut to zero, and there’s just one mould to buy. You’re a hero. You can also, by the way, 3D print living hinges with SLS nylon.
Family Mould
Another way to achieve hero status is the use of family moulds, which are ideal when producing a series of parts with similar shapes and sizes. The two mating parts mentioned above are good candidates, as is any group of parts that make up a complete assembly. Obviously, all must be made of the same material, and the combined part extents must fit within the roughly 175 sq. in. (1,129 sq. cm.) working mould cavity volume.
Hardware Harmony
Everyone’s heard the adage about reinventing the wheel. Designing and manufacturing your own nuts, screws, shafts, pins, keys, and dozens of other off-the-shelf components should be avoided at all costs. Better to redesign your product around standard hardware items, especially if production volumes are expected to rise at some point.
Moving to Monoform
The properties that make plastics such as polypropylene (PP) and styrene butadiene (SB) excellent candidates for living hinges also makes them suitable for other flexible components, providing clever part designers with opportunities to simplify assemblies and shrink BOMs—in some cases, a once-complex assembly can be reduced to a single piece. For example, a series of metal shock absorbers in a piece of sporting goods equipment might be replaced with a plastic one, and moulded together with the mating component. Instead of bolt-on metal leaf springs in a small lot of radio-controlled cars, mould them out of nylon as part of the chassis. Nor do designers need to adhere to traditional shapes—a coil spring can easily take a curvy zig-zag shape, or that of an S, C, or 3. Just be sure the mechanical, chemical, and electrical properties of the chosen plastic are appropriate for the environment in which they’ll be used.
Easy Assembly
If a product must be assembled, attempt to make the task easier by orienting the various screws and connectors in such a way that all are accessible from the same side, thus minimising part flipping and rotating. Use common hardware wherever possible, so the worker doesn’t have to reach for different hand tools. Mistake proof the assembly by designing in alignment pins and guiding features to avoid mismatched parts. And spend a little time in the assembly room: Knowing the issues that emerge at this stage often yields big improvements in part design.
Over and Out
Looking at Alternatives


